
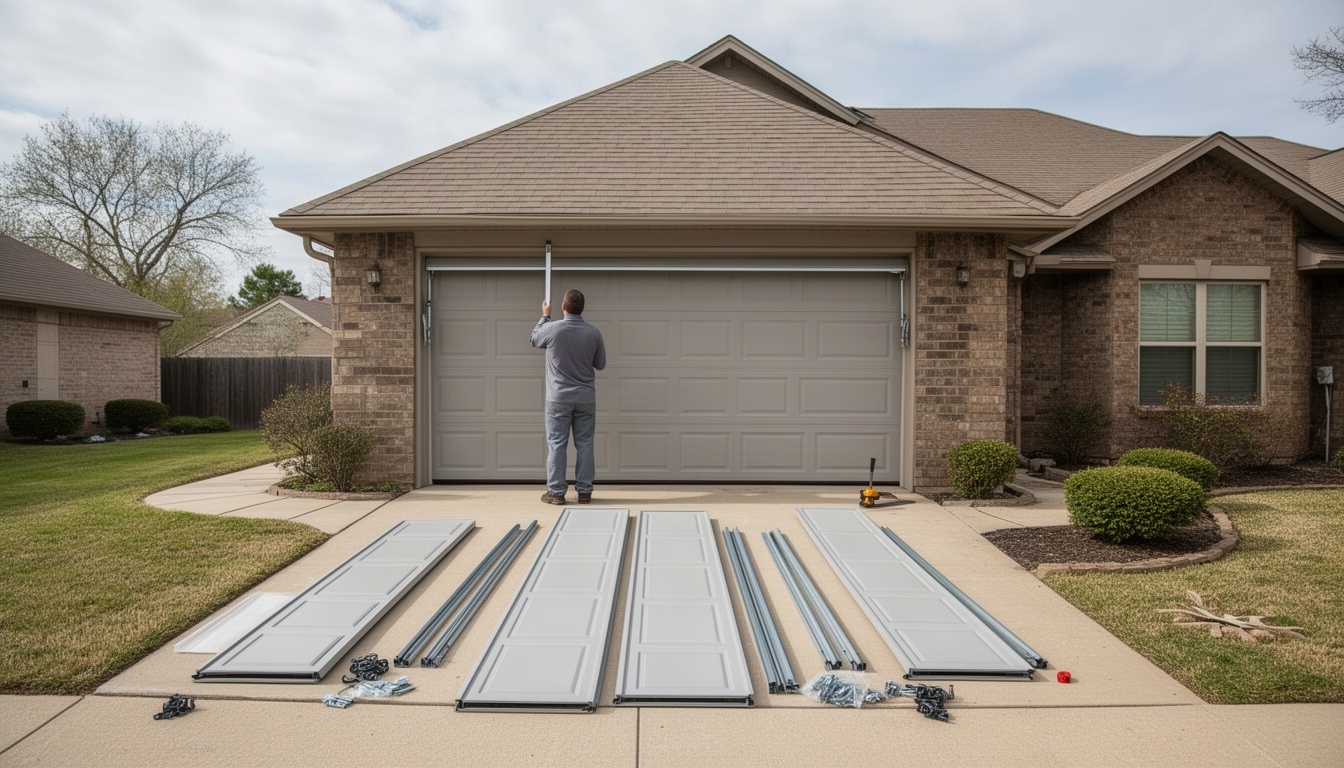
Steps To Install Garage Door in Celina, TX: 911 Garage Door Repair Pros serves Celina and the surrounding area. Visit 911garagedoorrepairpros.com for a free quote.
In This Article
- TL;DR
- Introduction: What You Need to Know About Installing a Garage Door in Celina
- What You Need Before Starting a Garage Door Installation in Celina
- How Do You Measure and Prepare the Garage Door Opening?
- Step-by-Step: Installing Garage Door Panels and Track
- How Do You Install and Program a Garage Door Opener in Celina?
- Final Checks, Weatherstripping, and Celina-Specific Maintenance Tips
- When Should You Hire a Professional Instead of DIY in Celina?
- Frequently Asked Questions About Garage Door Installation in Celina
- Conclusion: Your Next Step
TL;DR
Installing a garage door in Celina requires careful planning, the right tools, and adherence to local building codes. Learn more about garage door installation cost in the Dallas area. You'll need to measure your opening precisely, assemble panels and track systems, install springs safely, and wire the opener to meet Texas electrical standards. Most DIY installations take a full day; professional installation runs $1,350–$1,800 in the Collin County area, while DIY materials cost around $1,030. Always check with the City of Celina Development Services before starting.
Introduction: What You Need to Know About Installing a Garage Door in Celina
Installing a garage door in Celina is a manageable project for confident DIYers - but it demands respect for the mechanics involved and compliance with local codes. Whether you're replacing an old door or installing one in a new opening, the steps follow a proven sequence: measure the opening, prepare the frame, assemble panels and track, install the spring system, mount the opener, and run final safety checks.
Most installations involving structural work require a building permit from the City of Celina. Our expansive clay soils (common across Collin County) can shift framing seasonally, so a solid installation that accounts for these local conditions will serve you far better than a generic approach.
What You Need Before Starting a Garage Door Installation in Celina
Permit Requirements in Celina
See our guide to garage door spring replacement cost in Celina.
The City of Celina Development Services handles building permits for residential construction. See our guide to New Garage Door Cost Celina TX. Most installations involving structural changes - new openings, header modifications, or full door replacement with hardware changes - require a permit. A straight panel-for-panel replacement may qualify for exemption, but verify this directly with the city before proceeding. Contact Development Services at 972-382-2682 or visit their permit page. Permit fees typically start at $50–$100; processing takes 3–7 business days.
Tools You'll Need
- Level (4-foot)
- Winding bars (two, sized to fit your spring's winding cone - never use screwdrivers)
- Power drill with bits and socket attachments
- Socket set (7/16", 1/2", 9/16")
- Stepladder (6–8 feet)
- Tape measure (25-foot minimum)
- Adjustable wrench and pliers
- Carpenter's square
- Safety glasses and work gloves
Materials Checklist
- Door panels (typically 4–8 sections)
- Hinges (numbered by position: #1, #2, #3, etc.)
- Rollers, horizontal and vertical track sections with brackets
- Torsion spring system (or extension springs)
- Cables, bottom seal and weatherstripping
- Garage door opener and safety sensors
- Hardware kit (bolts, lag screws, washers, nuts)
Safety Warning: Torsion Springs
Torsion springs store enormous energy under tension. Improper winding or handling can cause serious injury or death. The Consumer Product Safety Commission documents thousands of garage door injuries annually, with springs and pinch points as primary causes. If you're a first-time installer, strongly consider hiring a professional for the spring installation step. If you proceed, use only properly fitted winding bars - never screwdrivers. Keep hands, face, and body clear of the winding cone at all times.
Key Takeaway: Verify your permit status with Celina's Development Services before ordering materials. Torsion spring installation is the highest-risk step - professional installation for this component alone costs $200–$400 but eliminates injury risk.
How Do You Measure and Prepare the Garage Door Opening?
Measure Width, Height, Headroom, and Sideroom
- Width at top, middle, and bottom (should match within 1/4 inch)
- Height on both sides (should match within 1/4 inch)
- Headroom (standard torsion systems require 15 inches minimum; less requires a low-clearance conversion kit)
- Sideroom (standard track systems need 3.75 inches minimum on each side)
Check the Opening for Square
Measure diagonally from top-left to bottom-right, then top-right to bottom-left. If both measurements match within 1/4 inch, your opening is acceptably square. If they differ by more than 1/4 inch, the frame is racked and must be straightened before installation.
Remove the Old Door and Hardware Safely
Read more about Garage Door Won't Close in McKinney TX.
Disconnect the opener and manually lower the door fully. Support it with blocks or a helper. Unbolt hinges, rollers, and track brackets. If the old door has a torsion spring, do not attempt to remove it yourself - call a professional.
Inspect and Repair the Frame
Check the header and side jambs for rot, cracks, or damage. Celina's humid climate can weaken wood framing. If you find soft spots, reinforce or replace that section before installing the new door. Ensure the header is level and jambs are plumb.
Our region experiences significant temperature swings - from sub-freezing winters to 100°F+ summers. Re-check vertical track plumb after the first full wet/dry cycle following installation, as Blackland Prairie clay soils prevalent across Collin County can shift framing seasonally.
Key Takeaway: Diagonal measurements within 1/4 inch = square opening. Headroom under 15 inches requires a low-clearance kit. Inspect wood framing for rot before ordering.
Step-by-Step: Installing Garage Door Panels and Track
Step 1: Position the Bottom Panel
Lay the bottom panel exterior-side-down on a clean, flat surface. Attach the bottom hinges (#1 hinges) using bolts and washers. Tighten to finger-tight, then an additional quarter-turn - do not over-torque. See all of our services.
Step 2: Install Rollers and Attach the Panel to the Opening
Insert rollers into the hinge holes. Lift the bottom panel into the opening, centered and level. Use shims to hold it in place. Bolt the top hinges to the header bracket at finger-tight-plus-quarter-turn torque.
Step 3: Stack Remaining Panels
Attach the appropriate hinges (#2, #3, etc.) to each successive panel. For more details, see signs your garage door needs repair. Stack panels in order, connecting each via hinges and rollers. Use your level frequently - misaligned panels cause binding and are the most common installation mistake.
Step 4: Assemble and Install Track
Connect vertical and horizontal track sections using provided brackets. Vertical tracks should be perfectly plumb; horizontal tracks should slope downward toward the back of the garage at approximately 1/4 inch per foot. Bolt vertical tracks to side jambs using lag bolts into solid framing. Verify plumb and slope before fully tightening.
Step 5: Install the Spring System
Torsion Spring Installation (Recommended Professional)
Mount the shaft and spring assembly to the header using provided brackets. The springs used in opening and closing a garage door support the entire weight of the garage door. Use only properly fitted winding bars. Wind the spring according to your door's weight and spring specifications. Keep hands and face clear of the winding cone at all times. For first-time installers, hire a professional - it costs $200–$400 and eliminates serious injury risk.
Extension Spring Installation
Extension springs mount on the horizontal tracks, one on each side. Attach the spring to the track bracket, then to the cable. Tension is adjusted by moving the cable attachment point.
Step 6: Install Cables and Test Balance
Connect cables to the spring system and route through pulleys. Disconnect the opener and manually lift the door to approximately waist height (3 feet). Release it - a properly balanced door should remain within 2 inches of that position. If it rises, springs are overwound; if it drops, they're underwound. Do not reconnect the opener until the door balances correctly.
Key Takeaway: Hinge numbering matters - #1 at bottom, #2 above, etc. Mismatched hinges cause binding within weeks. Torsion spring winding is the highest-injury-risk step; professional installation is strongly recommended for first-timers.
How Do You Install and Program a Garage Door Opener in Celina?
Mount the Header Bracket and Rail Assembly
Position the opener's header bracket centered above the door opening, typically 12–18 inches above the top of the door. Bolt it to solid framing using lag bolts. Attach the rail assembly level and aligned with the door's center line.
Connect Power and Install GFCI Protection
Texas electrical code requires a GFCI-protected outlet within 6 feet of the garage door opener. Install a GFCI outlet if one doesn't exist, or plug the opener into an existing GFCI outlet.
Install Safety Sensors
Mount photo-eye reversing sensors no higher than 6 inches above the finished floor, facing each other across the door opening. Test by waving your hand between the sensors - the door should reverse immediately.
Connect the Trolley and Program the Remote
Attach the trolley to the door using the provided bracket. Adjust limit switches so the door stops precisely at full open and full closed. For the remote, press the "Learn" button on the opener unit, then press the remote button to sync. Repeat for additional remotes.
Test Auto-Reverse (Entrapment Protection)
Place a 2x4 board flat on the floor in the door's path and close the door using the remote. The door must reverse immediately upon contact. This test is required by UL 325 safety standards and must pass before the door is put into service.
Key Takeaway: GFCI outlet within 6 feet is required by Texas code. Safety sensors must be no higher than 6 inches above the floor. Test auto-reverse with a 2x4 before putting the door into service.
Final Checks, Weatherstripping, and Celina-Specific Maintenance Tips
Balance Test (Final Verification)
Disconnect the opener one more time. Manually lift the door to waist height and release. It should remain stationary within 2 inches of that position. If it doesn't, adjust springs before reconnecting the opener.
Install Weatherstripping
Attach top and side weatherstripping to the door frame. The bottom seal is especially critical - it takes the most abuse from temperature cycling and ground contact. Celina's temperature swings (from -5°F to 110°F) stress the bottom seal more than milder climates; inspect it every 6 months and replace it annually or when you notice cracks or gaps.
Lubrication Schedule for North Texas Heat
Apply white lithium grease or silicone spray to hinges, rollers, and torsion springs every 6 months. In our 100°F+ summers, lubricant breaks down faster than in milder climates. Never use WD-40 - it attracts dirt and doesn't provide lasting lubrication.
Seasonal Re-Check After First Year
After one full wet/dry cycle, re-check vertical track plumb. If tracks have moved, loosen bolts slightly, re-shim until plumb, then re-tighten. This is especially important in Celina's Blackland Prairie soil areas.
Key Takeaway: Replace bottom seal annually in North Texas climate. Lubricate every 6 months with lithium grease, never WD-40. Re-check track plumb after the first full wet/dry cycle.
When Should You Hire a Professional Instead of DIY in Celina?
Torsion Spring Installation: Hire a Professional
Torsion springs store enough energy to cause serious injury or death if mishandled. Professional spring installation costs $200–$400 and eliminates this risk. If you're not experienced with high-tension mechanical systems, this step alone justifies hiring help.
Custom or Oversized Doors: Hire a Professional
Three-car doors, carriage-house styles, or custom dimensions add complexity. Track alignment becomes more critical and weight distribution requires precise calculation. Mistakes here are expensive to fix.
Cost Comparison: DIY vs. Professional
DIY Total:
- Door panels: $800
- Hardware kit (hinges, rollers, track, brackets): $150
- Tools (level, winding bars, socket set, if you don't own them): $80
- Total: ~$1,030
Professional Installation Total:
- Door panels: $800
- Labor and installation: $550–$1,000
- Total: $1,350–$1,800
The professional premium ($320–$770) covers expertise, liability insurance, and safe spring installation. If you're mechanically confident and willing to invest a full day (8–10 hours), DIY can save you $300–$700. If you're uncertain about any step - especially springs - hire a professional. 911 Garage Door Repair Pros offers free estimates so you can compare costs before deciding.
Key Takeaway: Torsion spring installation is the primary reason to hire a professional. DIY saves $300–$700 but requires a full day and mechanical confidence. Professional installation costs $1,350–$1,800 total and includes liability coverage.
Frequently Asked Questions About Garage Door Installation in Celina
Do I need a permit to install a garage door in Celina?
Most installations involving structural work require a building permit. Contact the City of Celina Development Services at 972-382-2682 to verify your specific situation. Panel-for-panel replacements may be exempt, but always check before starting. Permit fees typically run $50–$100 and processing takes 3–7 business days.
How long does it take to install a garage door yourself?
A first-time DIY installation typically takes 8 to 10 hours for a single-car door, according to Clopay Garage Door Installation. Professional installation usually takes 4–6 hours. Don't rush - taking your time ensures proper alignment and safety.
Is it safe to install torsion springs without a professional?
Torsion spring installation is not recommended for first-time installers. Improper winding can cause the spring to snap with lethal force. Hiring a professional for this step costs $200–$400 and eliminates the injury risk entirely.
What is the difference between torsion and extension springs?
Torsion springs mount on a shaft above the door and wind to store energy; extension springs mount on the horizontal tracks and stretch. Torsion springs last longer (7–12 years), provide more balanced lift, and are the industry standard for modern doors. If your door uses extension springs, consider upgrading during replacement.
What size garage door should I order?
Measure your rough opening width and height, then verify headroom and sideroom. Standard single-car doors are 9 feet wide by 7 feet tall; double-car doors are 16 feet wide by 7 feet tall. Most track systems need 15 inches of headroom and 3.75 inches of sideroom on each side.
What garage door materials hold up best in North Texas heat?
Insulated steel doors (24-gauge, R-10 or higher) perform best in Celina's climate. They resist hail damage, manage thermal cycling, and reduce HVAC load. Our temperature swings - from -5°F to 110°F - stress uninsulated doors and seals. Invest in insulated steel for longevity.
Conclusion: Your Next Step
Installing a garage door in Celina is achievable for confident DIYers, but it demands precision, safety awareness, and respect for local codes. Our North Texas climate and expansive clay soils add specific considerations that generic guides miss.
If you're confident in your mechanical skills, DIY can save you $300–$700. If you're uncertain about any step - especially spring installation - hiring a professional is the safer choice.
Start by contacting the City of Celina Development Services at 972-382-2682 to verify your permit requirements. Then gather your tools and materials, or reach out to a local provider for a free estimate. 911 Garage Door Repair Pros offers free estimates and can help you decide whether DIY or professional installation makes sense for your situation. Visit them at http://www.911garagedoorrepairpros.com or call to discuss your project.